Checkout page Map
Insert a map on the checkout page that lets customers pick their delivery location
Plus Code
Let customers specify their delivery location with a Google Plus Code

Shipping Zones by Drawing plugin opens the possibility to make custom shipping areas in WooCommerce. You can define variable shipping rates and use multiple shipping origins.
Define your own shipping areas by drawing into a map or by a radius from your store location
Use fixed shipping rates or set a rate per transportation distance
Set minimum order amounts to control the shipping rate by how much your customers are spending
Insert a map on the checkout page that lets customers pick their delivery location
Let customers specify their delivery location with a Google Plus Code
If you make deliveries from multiple locations, you can decide from where a shipping method will have it´s origin and thereby offer the most apropiate shipping for the customer
Possibility to distinguish shipping costs and zones depending on the product categories included in the delivery
Let’s say you aim to offer free deliveries for orders amounts above $150 and charge $10 for delivery for orders amounts below $150.
Besides, only allow deliveries to a certain delivery area, in this example called “Boston”.
This can be achieved by adding two shipping methods.
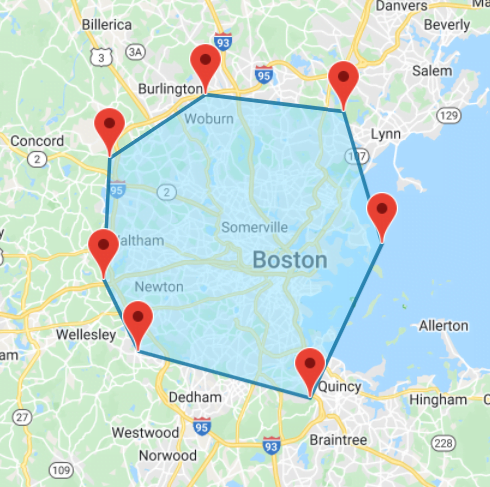
Start by creating a drawn shipping area at Dashboard -> WooCommerce -> Shipping Zones by Drawing. Give it the title “Boston”.

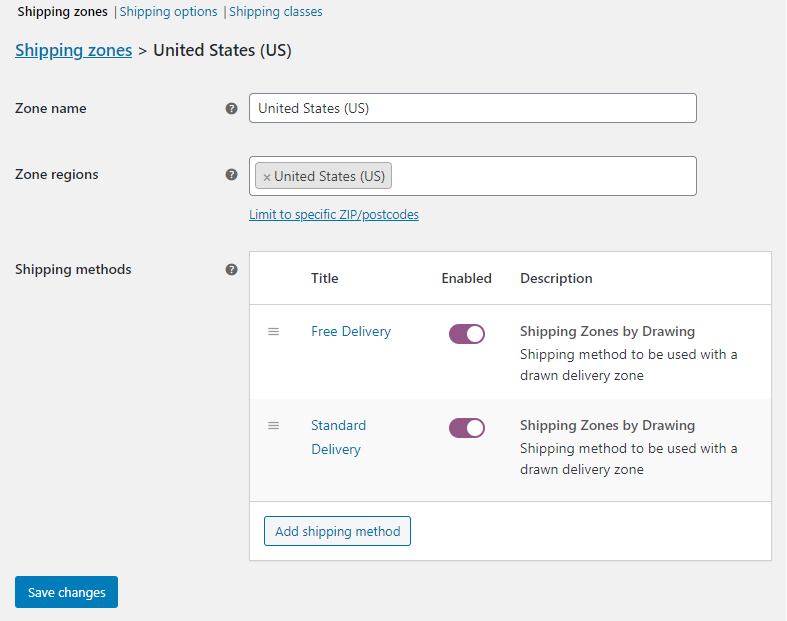
Add a “Shipping Zones by Drawing” shipping method with a flat rate of $0 and a minimum order amount of $150.
Choose the “Boston” delivery zone.

Then add a second shipping method with a flat rate of $10 and choose the “Boston” delivery zone.

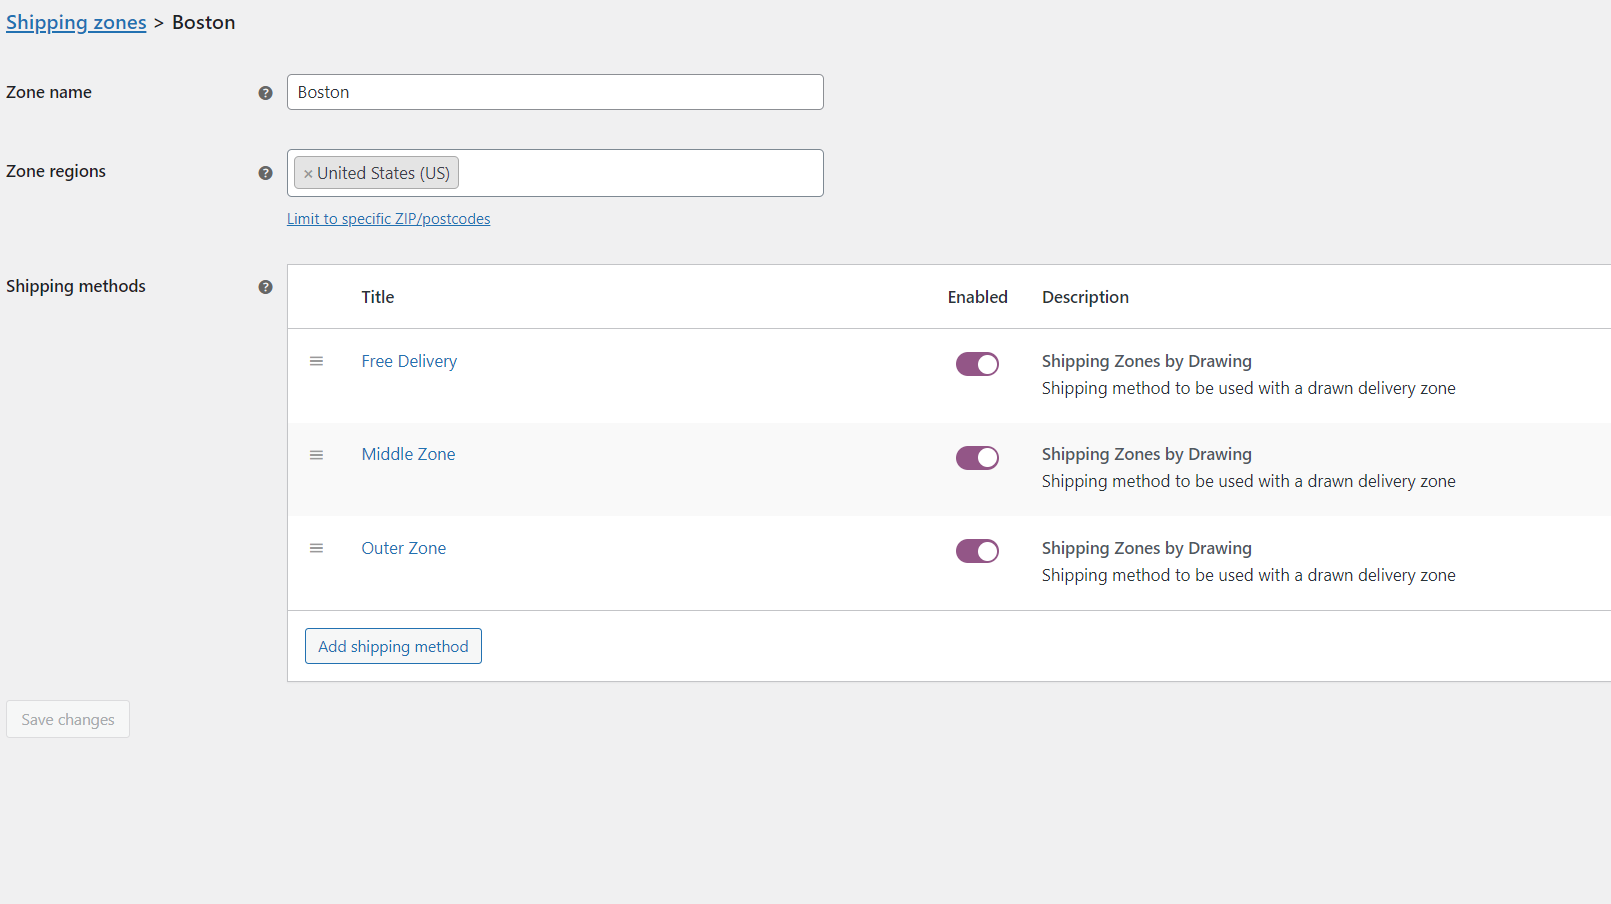
Now your WooCommerce shipping zone setup should look like the figure below.
At the plugin settings page, select the option to only show the lowest cost shipping method at checkout. If you don´t choose this option booth of the delivery methods will be available at checkout.

The setup is now ready and we have accomplished our aim.
Shipping address within the delivery area “Boston”

Order amount above $150

Order amount below $150

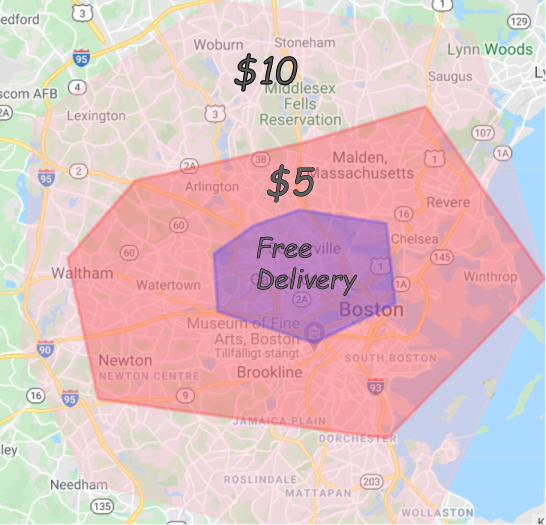
In this example, we like to offer free deliveries in the inner of the city, a $5 delivery cost in a middle zone, and $10 in an outer region from the city center.
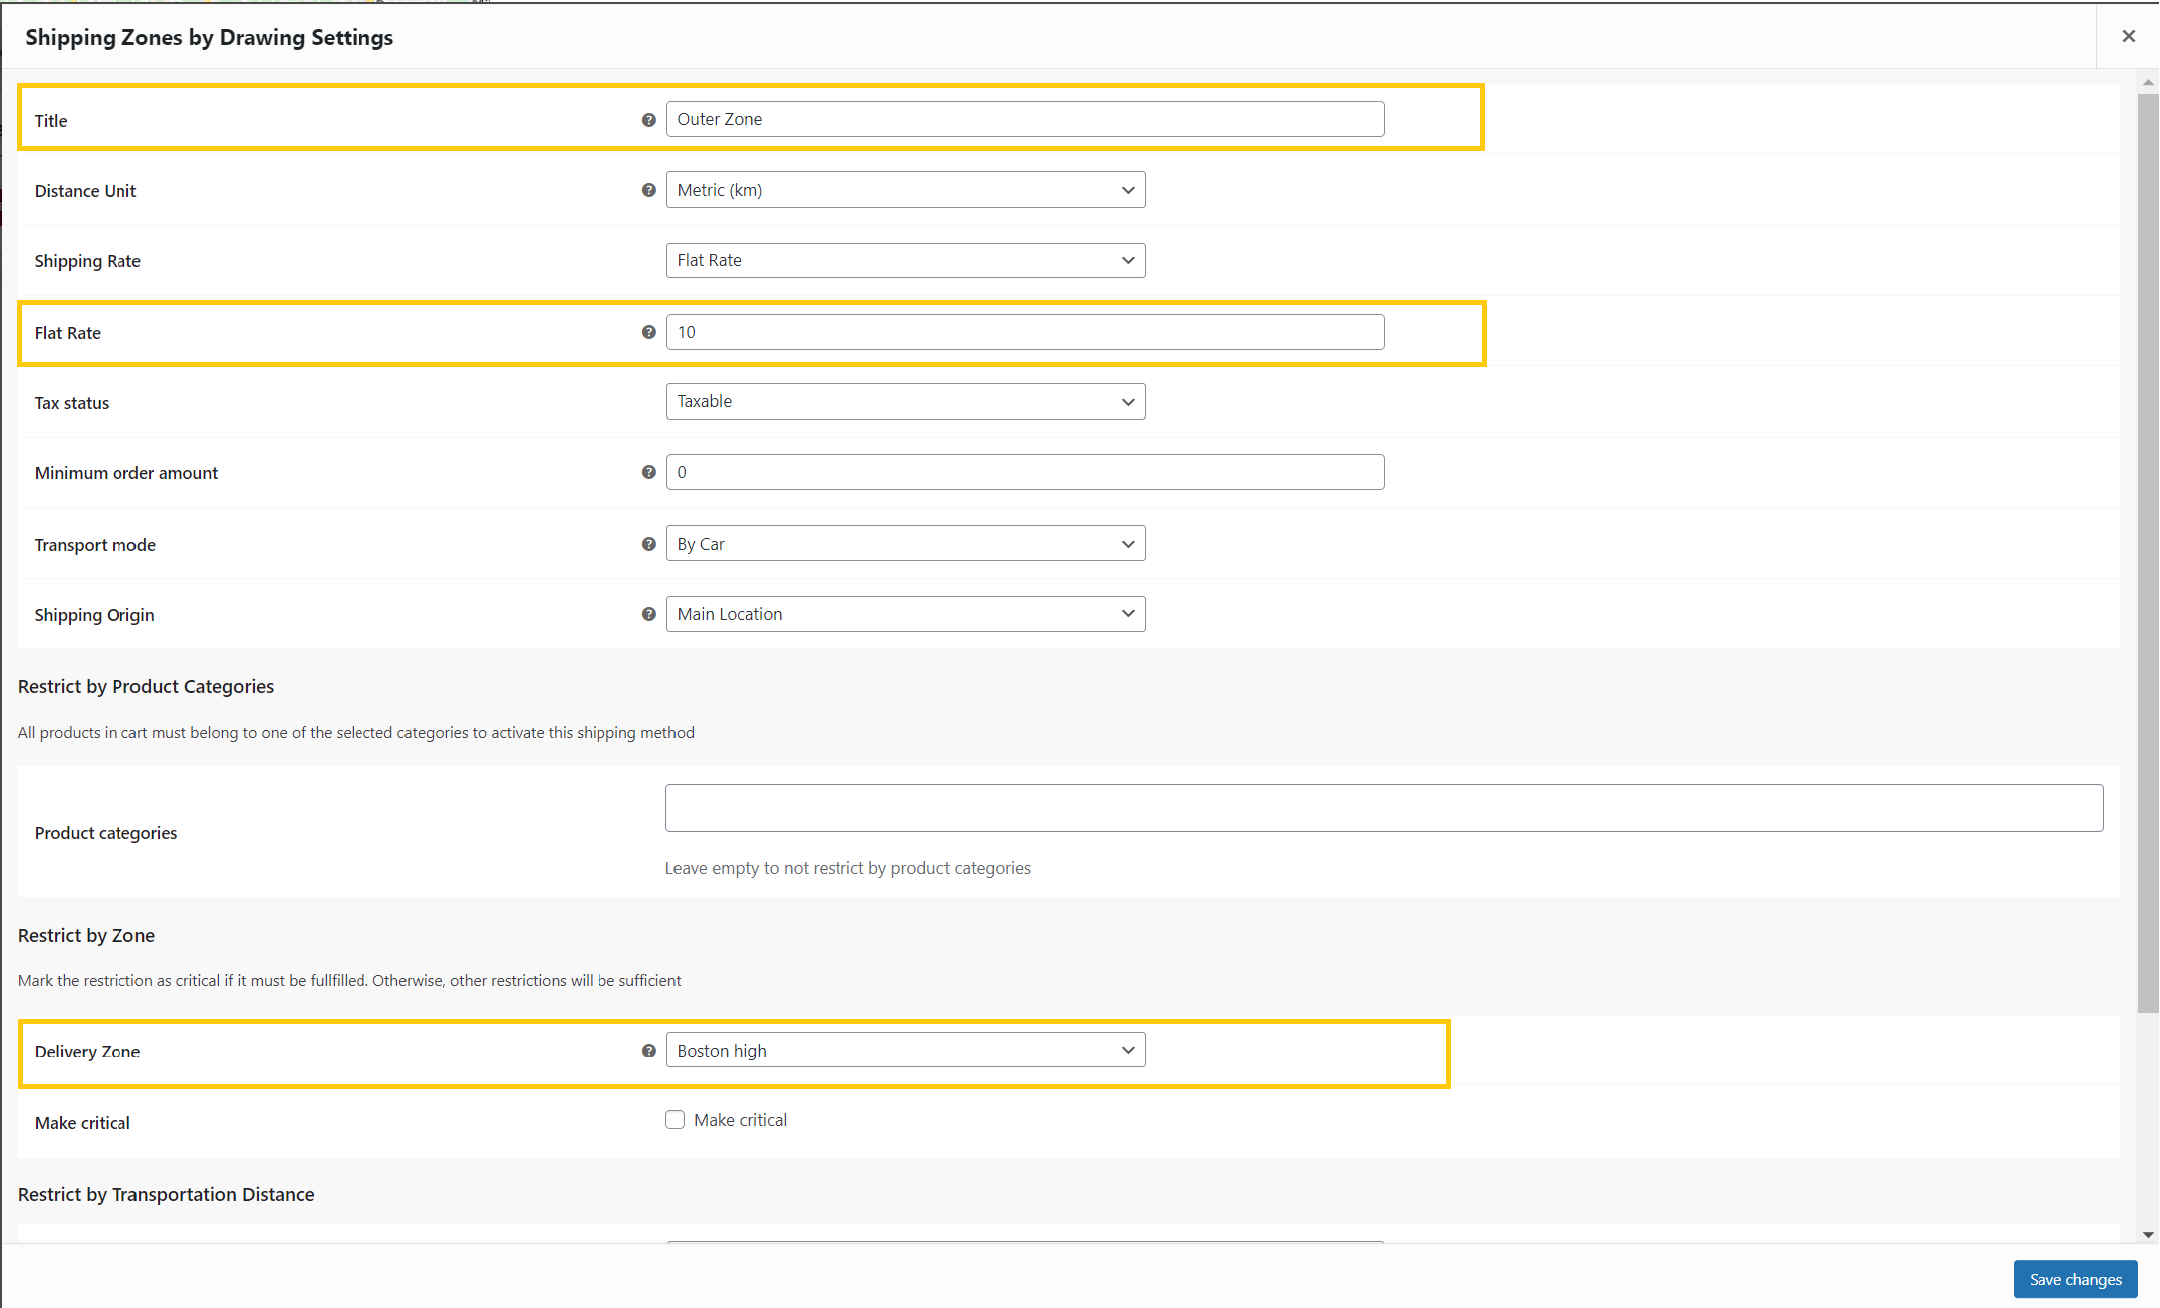
Let´s start by creating a drawn shipping area at Dashboard -> WooCommerce -> Shipping Zones by Drawing. Give it the title “Boston high”.
Add a “Shipping Zones by Drawing” shipping method with a flat rate of $10.
Choose the “Boston high” delivery zone.
Continue by drawing a second delivery zone (Boston middle) and adding a second delivery method (Middle Zone) with a $5 flat rate and the new “Boston middle” delivery zone as a restriction.


Finally, draw a third delivery zone (Boston free) and add a third delivery method (Free Delivery) with a $0 flat rate and the new “Boston free” delivery zone as a restriction.

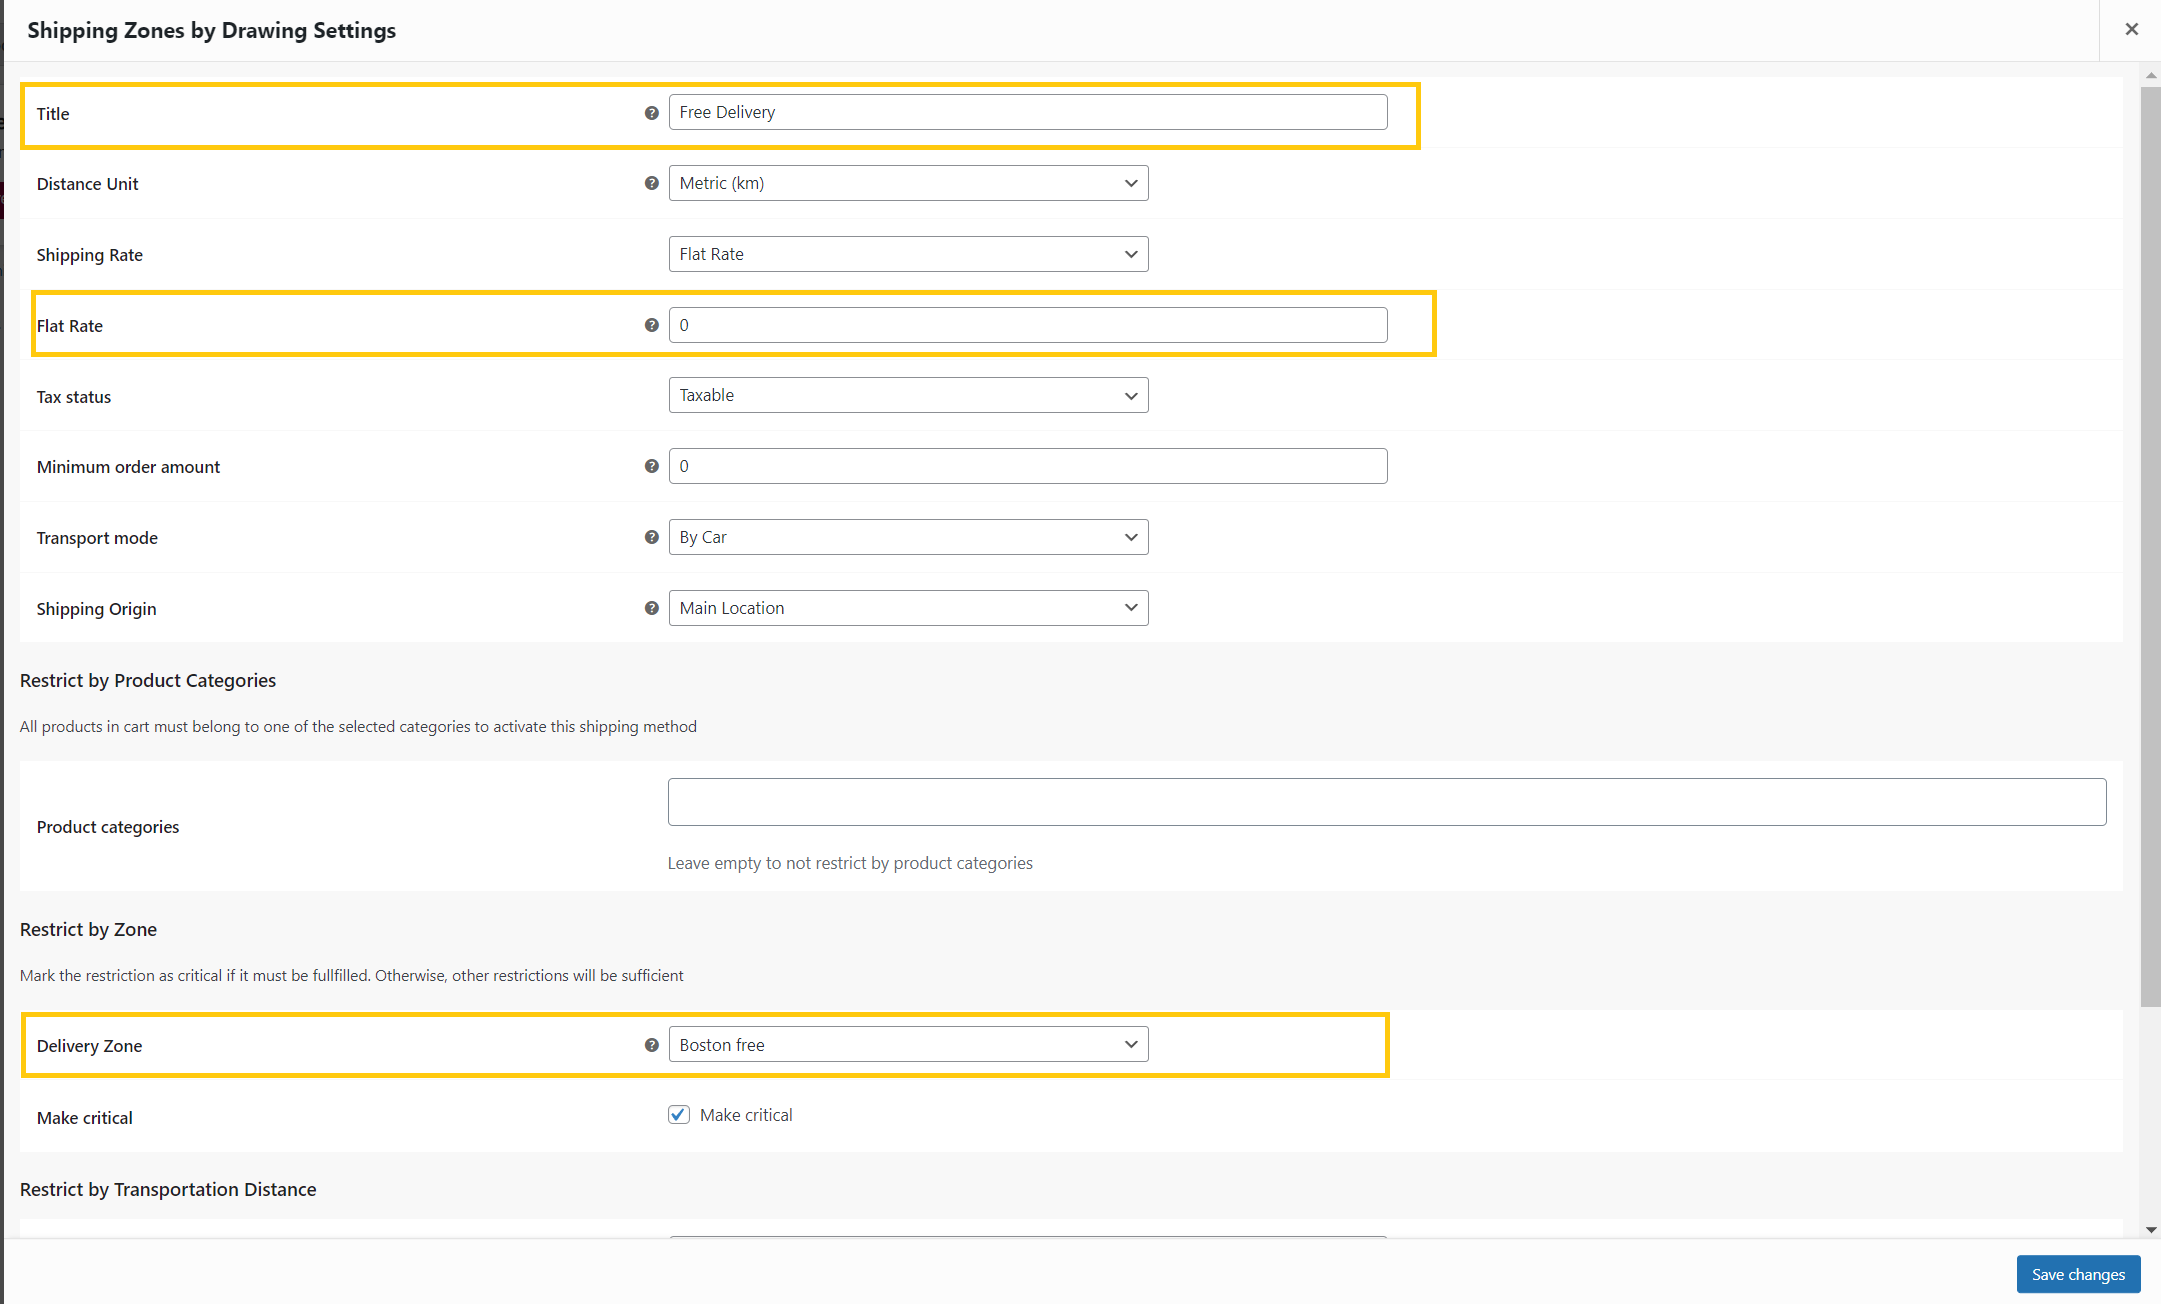
Your WooCommerce shipping zone setup should now look like the figure below.
At the plugin settings page, select the option to only show the lowest cost shipping method on the checkout page. If you don´t choose this option all three of the delivery methods will be visible at checkout when the delivery address is in the most central zone.
All done!
The configuration is now ready and the three zones will be overlapping each other. The most cost-friendly alternative will be shown on the checkout page depending on the customer’s delivery address.